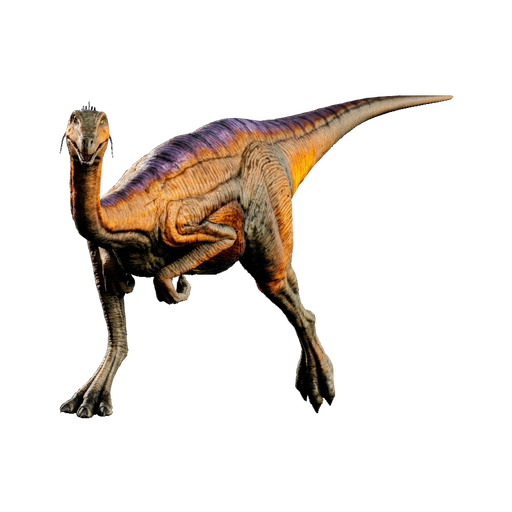
갈리미무스
크리처
번식 계산기
갈리미무스
설정부화 1× · 성장 1× · 먹이 1× · 무게 270
아기: 부화한 생물은 이제 새끼가 되어, 생존하려면 지속적인 관심과 인벤토리에 직접 넣어 준 먹이가 필요하며, 근처에 메윙이 있으면 필요한 것을 돌봐 줄 수 있습니다.
- 부화
- 1h 25m 42s
- 성숙
- 26h 27m 18s
- 부화 온도
- 24 - 28 °C
- 출생 시 음식
- 59.03/min




성장 진행도
- 상태:
- 아기
- 남은 시간:
- 25:07:56
- 총 시간:
- 26:27:18
성숙
- 부화 시간
- 1h 25m 42s
- 경과 시간
- 1h 19m 22s
- 남은 성장 시간
- 25h 7m 56s
 미성년자까지의 시간
- 1h 19m 22s
 음식
- 총 음식 아이템
- 937아이템
- 성체까지 음식
- 612아이템
- 시간당 먹이
- 68
 음식 용량
- 135아이템
 아기 수동 먹이기 시간
- 해당 없음4.1% 성숙
각인
ARK의 기본 8시간 애정표현 간격을 사용한 추정치입니다. 이 생물의 간격이 다르면 아래에서 설정하세요.
- 애정표현 간격
- 8h
- 교감당 각인
- 32.7%
- 최대 각인
- 98.1% (애정표현 3회)
설정8시간 · 간격 ×1 · 양 ×1
육아용 음식
 아이템당 음식
- 30
 스택 크기
- 100
- 5%에 먹음
- 56.08 음식/분
- 성숙
- 26h 27m 18s
| 단계 | 남은 시간 | 음식 포인트 | 메조베리 | 스택 | 무게 |
|---|---|---|---|---|---|
| 아기5%에서 10%까지 이만큼 필요 | 1h 19m 21s | 4,333 | 145 | 2 | 14.5 |
| 유년기10%에서 50%까지 이만큼 필요 | 10h 34m 55s | 26,234 | 875 | 9 | 87.5 |
| 청소년기50%에서 100%까지 이만큼 필요 | 13h 13m 39s | 11,712 | 391 | 4 | 39.1 |
| 총계 | 25h 7m 56s | 1,411 | 15 | 141.1 |
합계: 메조베리 1,411개
- 여물통
- 6,000 아이템 (60 슬롯)한 번에 적재 가능
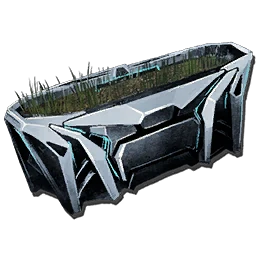 텍 여물통
- 10,000 아이템 (100 슬롯)한 번에 적재 가능
- 메이윙 / 메이구아나
- 300 슬롯고기와 베리 무게 50% 감소
- 아기 - 여물통 보충 2회 필요 (단계가 끝나기 전에 먹이가 부패함)
- 유년기 - 여물통 보충 16회 필요 (단계가 끝나기 전에 먹이가 부패함)
- 청소년기 - 여물통 보충 20회 필요 (단계가 끝나기 전에 먹이가 부패함)
부패 시간 10m | 여물통 / 메이윙: 40m | 텍 여물통: 16h 40m
새끼 단계(0-10%) 동안에는 직접 먹이를 주거나 메윙을 사용해 수유해야 합니다. 청소년기(10% 이상)부터는 생물이 스스로 여물통에서 먹을 수 있습니다. 여물통에 보존 소금을 사용하면 부패 시간이 두 배가 됩니다.
갈리미무스 번식 자세히 보기
After a successful mate, the Gallimimus lays a fertilized egg. Incubation temperature must stay between 24°C and 28°C - use Air Conditioners, Standing Torches, or Dimetrodons to maintain the range. At the correct temperature, the egg hatches in approximately 1 hour and 25 minutes.
After hatching or birth, the baby Gallimimus matures requiring significant patience, reaching adulthood in about 1 day and 2 hours at 1x maturation. Hand-feeding is required until 10% maturation. After that, a Feeding Trough handles the rest.
Mutations can add +2 levels to any stat and change colors. Stacking mutations across generations is the key to min-maxed breeding lines. Use the breeding calculator to plan food requirements, incubation timers, and maturation phases.
Raising a baby Gallimimus involves three maturation phases: Baby (0–10%) lasts ~159 min and requires constant hand-feeding. Juvenile (10–50%) spans ~11h - it can eat from a Trough now. Adolescent (50–100%) takes ~13h - continues eating from troughs, nearly fully grown.
Imprinting during maturation provides permanent stat bonuses. At 100% imprint, the Gallimimus gains 30% bonus damage and resistance when ridden by the imprinter. You'll be asked to cuddle, walk, or feed specific kibble at regular intervals during maturation.
Planning a mass raise? The Gallimimus raising calculator breaks down food needs per phase so nothing goes to waste. The Baby phase (0–10%) takes ~159 minutes and is the most hands-on, requiring direct feeding or a Maewing.
Raising multiple Gallimimus simultaneously? Set the dino count and the calculator scales food requirements automatically. Match your food choice to your play schedule - longer spoil timers mean less babysitting.
ARK: Survival Ascended features the Gallimimus as a tamable, herbivore creature that survivors will encounter in the wild.
Its base Melee Damage sits at 100%, giving it solid damage output. Starting at 150 Health, it's on the squishy side. Stamina sits at 300 base, providing decent staying power. Weight capacity starts at 270, giving it a solid weight pool.
To tame the Gallimimus, you need to knock it unconscious using torpor weapons, then feed it while it's down. For best results, use Simple Kibble - it gives the highest taming efficiency.
As a tame, the Gallimimus earns its keep through resource gathering, making tedious farming runs much faster. Breeding produces fertilized eggs that hatch within a 24°C–28°C temperature window. Killing a wild Gallimimus yields 1 base XP. It can be cloned at a Cloning Chamber for 0.35 Element plus 0.01 Element per level.