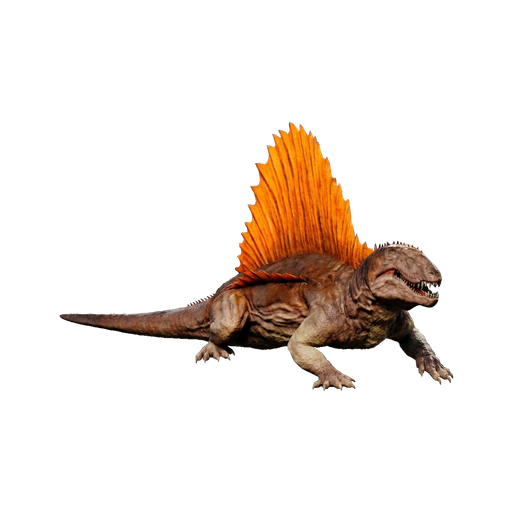
Aberrant Dimetrodon
KreaturVariante
Zähm-Rechner für Aberrant DimetrodonBetäubung
Knock the Aberrant Dimetrodon unconscious using your preferred torpor weapon, then feed it to begin the taming process. Torpor bleeds at 5/s, requiring regular sedative application to prevent a premature wakeup.
- Wildlevel150
- Gezähmtes Level223+73
- Max. Level nach dem Leveln296
Zähmfutter
| Nahrung | Menge | Zähmzeit | Effektivität | Fütterungsintervall |
|---|---|---|---|---|
 Normales Kibble | 40m 56s | 98,46%+73 Lvl (223) | 4m 6s | |
 Rohes Hammelfleisch | 48m 1s | 93,73%+70 Lvl (220) | 2m 25s | |
 Rohes Filet | 1h 0m 1s | 90,53%+67 Lvl (217) | 2m 25s | |
 Raw Supreme Fish Meat | 30m 1s | 90,53%+67 Lvl (217) | 1m 13s | |
 Gekochtes Lamm-Kotelett | 1h 28m 43s | 81,32%+60 Lvl (210) | 2m 24s | |
 Gegrilltes Filet | 1h 59m 54s | 70,44%+52 Lvl (202) | 2m 24s | |
  Cooked Supreme Fish Meat, Prime Fish Jerky | 1h 1m 40s | 70,44%+52 Lvl (202) | 1m 14s | |
 Filet, geräuchert | 1h 59m 54s | 70,44%+52 Lvl (202) | 2m 24s | |
 Leicht Angereichertes Kibble | 3h 1m 28s | 60,18%+45 Lvl (195) | 2m 53s | |
 Rohes Fischfilet | 1h 15m 37s | 60,18%+45 Lvl (195) | 1m 13s | |
 Angereichertes Kibble | 3h 1m 28s | 60,18%+45 Lvl (195) | 2m 53s | |
 Rohes Fleisch | 3h 0m 2s | 51,39%+38 Lvl (188) | 2m 25s | |
 Gekochtes Fischfilet | 2h 34m 9s | 27,54%+20 Lvl (170) | 1m 14s | |
  Gegrilltes Fleisch, Räucherfleisch | 3h 0m 2s | 20,88%+15 Lvl (165) | 1m 13s | |
 Fish Jerky | 1h 30m 1s | 20,88%+15 Lvl (165) | 37s | |
 Roher Fisch | 3h 44m 26s | 14,48%+10 Lvl (160) | 1m 13s | |
 Gekochter Fisch | 3h 43m 50s | 4,08%+3 Lvl (153) | 37s |
Benötigte Narkotika
 213Narkosemittel
 626Narcobeere
 107Natürliches Gift
 659Ascerbic Pilz
Betäubungswaffen
 Bogen83 Normale Treffer26% Todeschance
 Armbrust48 Normale Treffer34% Todeschance
 Betäubungspfeil34 Normale Treffer0% Todeschance
 Schockender Betäubungspfeil17 Normale Treffer0% Todeschance
 Tek Bogen22 Normale Treffer0% Todeschance
 Kompositbogen62 Normale Treffer26% Todeschance
 Harpunenschleuder25 Normale Treffer0% Todeschance
- Fäuste533 Normale Treffer99% Todeschance
 Steinschleuder395 Normale Treffer100% Todeschance
Mehr zum Zähmen: Aberrant Dimetrodon
Use the calculator results to plan your tame - they show the exact time, food quantity, and bonus levels for the Aberrant Dimetrodon based on your settings.
The table below shows how many hits from each torpor weapon are needed to knock out the Aberrant Dimetrodon at different levels. Always pace your shots. Torpor takes time to apply, and over-shooting can be lethal.
The table shows how many sedatives you'll need to keep the Aberrant Dimetrodon unconscious through the full taming duration. Your options are Narcotics (40 Torpor), Bio Toxin (80 Torpor, best efficiency), or Narcoberries (7.5 Torpor, cheapest but slowest). The Aberrant Dimetrodon bleeds 5 Torpor/s, so keep a close eye on the bar and sedate early.
Use the torpor and starve timers to track your Aberrant Dimetrodon tame in real time. Torpor monitoring prevents premature wakeups. The starve timer is for the starve-tame method - let Food drop, then load all kibble at once to avoid waste.
ARK: Survival Ascended features the Aberrant Dimetrodon as a tamable, carnivore creature that survivors will encounter in the wild. It belongs to the Variant category.
Its base Melee Damage sits at 100%, giving it solid damage output. Starting at 350 Health, it's reasonably durable. Stamina sits at 300 base, providing average stamina. A base Weight of 250 means a solid weight pool.
To tame the Aberrant Dimetrodon, you need to knock it unconscious using torpor weapons, then feed it while it's down. For best results, use Regular Kibble - it gives the highest taming efficiency.
As a tame, the Aberrant Dimetrodon fills a general-purpose role, adaptable to whatever your tribe currently needs. Breeding produces fertilized eggs that hatch within a 30°C–34°C temperature window. Defeating one in the wild grants 4 base XP. It can be cloned at a Cloning Chamber for 0.08 Element plus 0.01 Element per level.